Door closer adjustment: how do you adjust it? Quick and easy guide on how to adjust it.
Door closer adjustment : This sounds like a pretty simple task, but it can be tricky if you don't know where to start. Here is a step-by-step guide on how to adjust a door closer .
Before you begin, make sure you have the following tools on hand: a screwdriver, a pair of work gloves, a measuring tape, and a paper clip.
Here's the quick explanation:
Once the adjustment is complete, you should notice the door opening more smoothly and having no impact when closing. Remember to be careful when adjusting, so as not to damage the door or injure yourself!
Go to our category to overhead door closers to discover the best models of this type. Are you looking floor mounted door closers? Don't miss the dedicated category on Windowo.
Continue reading this article to learn more about adjusting the door closer.

In short, a door closer is a mechanical device that sets itself to keep the door closed securely . It can be used on any type of door, such as a front door, a folding door or a sliding partition panel.
Door closers come in many different styles and sizes and can be installed to meet the different needs of your home or office.
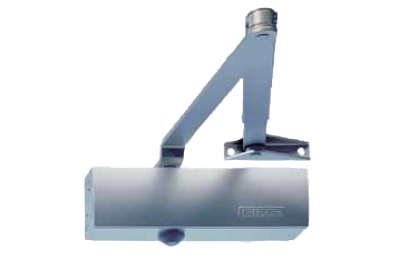
The door closer consists of two main parts:
The latch is mounted to the top of the door and is attached to a hook that is inserted into the door frame.
A spring inside the catch allows the hook to move freely so you can adjust the resistance it offers to the hook when pulled. This means that the tension of the closer can be adjusted to suit different door sizes in the house.
The operation of a door closer is simple.
Some devices can also be adjusted according to the height of the door, in order to maximize the efficiency of the door closer.
Most door closers can be easily adjusted to match the height of the door .
Usually there are no particular problems adjusting the device yourself, but if you wish you can always contact a specialized technician who can help you with the installation and door spring adjustment.
When you adjust your door closer, make sure you do it correctly so that it works at its best and protects against unauthorized entry into your space. Also, make sure all the components are tight so they don't move as you open and close the door.
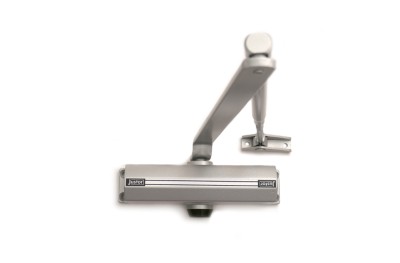
Adjustment of the door closer is usually very simple. In fact, to adjust it, all you need is a cross screwdriver or a flat head screwdriver.
After removing the stopper cover with the help of the screwdriver, you can turn the screw located inside, clockwise to increase the resistance or counterclockwise to decrease it.
Once the desired resistance has been reached, the cover must be reassembled and that's it (see the phases we talked about at the beginning of the article).
Replacing a door closer may seem like a complicated job but it's actually quite simple. Before you begin, make sure you have all the necessary tools on hand. You will need to get a new closer, the proper tool to remove the screw, a screwdriver and some tape.
Once you have everything on hand, start by removing the old closer rod. Use the appropriate tool to unscrew the screw holding the old rod to the wall. When you have managed to remove it, check if the hole is still in good condition. If it isn't, use duct tape to fix any problems before installing the new closer.
Then take the new closer and insert the base into the opening created with the removal of the old rod. If necessary, use masking tape to ensure it is level with the other side of the door. The upper part will be inserted into the already assembled rod and fixed with a screw that you will have to tighten with the screwdriver.
Once in place, check that it works correctly and that the two parts meet exactly when the door closes. If everything looks right, you're done.
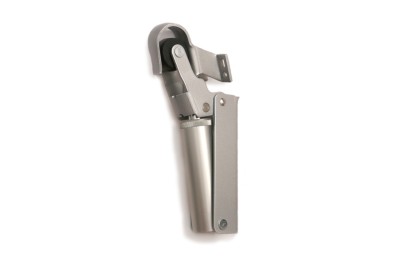
Adjusting the spring on a door closer is a simple task to perform.
First, make sure the door holder has been installed correctly. I point out that if the door is not well adhered to the wall, then the spring adjustment will have no effect.
Start by opening the closer and removing the two side retaining pins. The spring can now be accessed through the central opening. Adjust the spring by carefully turning the screw located on the top of the device.
Then, turn the screw counterclockwise to increase spring tension and clockwise to decrease it. You can experiment by turning the screw by different amounts until you find the desired level of tension. When you have found the ideal setting, screw the two pins back in and make sure they are tight.
Then place the closer back in its housing and check that it closes correctly. If necessary, further adjust the spring tension until the mechanism works properly.
If your door doesn't close properly, the tension on the closer may need to be adjusted .
To do this, there are several possibilities, depending on the type of mechanism you have installed.
Let's start with the most common - spring-loaded door closers . These devices usually feature a handwheel that can be turned to adjust the tension. If you turn the handwheel counterclockwise, you are releasing tension; if you do it clockwise instead, you're tightening it. It is important to adjust the tension correctly to ensure that the door closes properly both when open and when closed.
If you have a rocker or latch closer installed, things are a little different. In this case, you have to adjust a pin or nut on the mechanism to tighten or loosen the tension. You can do this with a simple screwdriver: just adjust it until you hear the door close well both when it is open and when it is closed.
Finally, if you have installed a magnetic door closer , there is no need to adjust any voltage: this type of device automatically adjusts to the door and can be installed without complications.
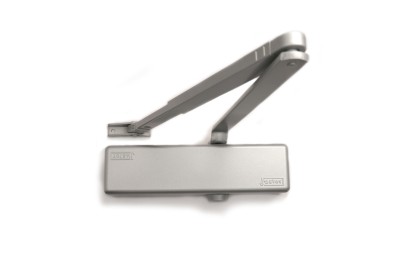
If you want to adjust a door closer arm , don't worry: it's a quick operation.
To do this, you need to check the door closer arm. It is a metal part located on the lower part of the door, which can be adjusted by turning it with the help of a screwdriver.
Start by checking if the arm is damaged or unstuck from the door. If it is, you'll need to replace it first. If the arm is undamaged, proceed with the adjustment.
To adjust the arm correctly , you must take into account two things: the height of the floor in relation to the upper edge of the door and the force required to close the door correctly.
Begin by slowly turning the arm counterclockwise until it touches the top edge of the door; then, rotate it clockwise until it reaches the desired position. Remember to make small steps in order to avoid excessive pressure and compromise the integrity of the mechanism.
To check if you have made the right adjustment, try closing and opening the door several times: if it opens easily and closes correctly without too much force, it means it worked! Otherwise, try rotating the arm again until you get the results you want.
If you're looking to install and adjust an automatic door closer , you've come to the right place. Here are some simple steps that will help you get your device up and running properly.
Before you begin, make sure you have everything you need to install. You will need the appropriate screws, plugs and tools to secure the device to the door.
Once you have everything you need, it's time to mount the automatic door closer . Secure the fixture to the top of the door with the screws provided, then secure the base to the floor with the included wall plugs. Make sure it's secure so it doesn't move around during use.
Once installed it is necessary to adjust the closing of the door . Most automatic door closers have an adjustment mechanism that allows you to set how fast the door closes. Adjust the speed to a comfortable level and make sure it doesn't close too quickly or too slowly.
If you have an automatic door closer that has a sensor , it needs to be adjusted. Sensors detect when someone enters the door and open it before it closes automatically. If the sensor is not properly adjusted, the device will not work properly and could cause problems or even damage. Then adjust the sensor until it works to your preference.
Finally, if you have purchased a new door closer (perhaps saving with Windowo's special offer prices), be sure to carefully read the instructions provided by the manufacturer before installing or adjusting the device. This way you can use it safely and efficiently and avoid problems.
We hope these steps helped you install and adjust your door closer. If you have any other questions or concerns, please don't hesitate to contact us.

I'm Elia Caneppele, author of this article and founder of Windowo, the Italian shop specialising in the online sale of products for windows. My speciality is doing SEO for ecommerce, which, in simple terms, means getting people to find us on the Internet.
Since 2014 I have been a digital entrepreneur and, in addition to managing Windowo, I also deal with the communication of Autismo.it. I create content trying to convey as much value as possible to our customers.
Want to improve your e-commerce ranking? Once a month, I offer SEO consulting for struggling online stores. Contact me on my social media to schedule a free call.